Classroom Seating Arrangements: 10 Layout Ideas That Work
The best classroom seating arrangement is the one that matches what students spend most of the period doing. Rows and testing layouts keep every eye on the board. Pairs and pods build in collaboration. A horseshoe or circle turns the room toward discussion. Below are ten classroom layouts with diagrams, what each one is best for, and how to make it work, plus a way to try any of them with your real class list before you move a single desk.
Last updated:
Classroom layout ideas: which one fits your lesson?
| If most of the period is… | Try | Why |
|---|---|---|
| Direct instruction or note-taking | Rows, Chevron | Every student faces the board |
| Partner work or think-pair-share | Pairs | A built-in partner with no furniture moving |
| Group projects or stations | Pods of 4, Clusters of 6 | Shared work surface, face-to-face talk |
| Whole-class discussion | Horseshoe, Double horseshoe, Circle | Students can see each other, not just you |
| Tests and independent work | Testing | Maximum space between desks |
| Labs and hands-on work | Lab benches | Fixed partners at shared stations |
| A mix of all of the above | Two charts: an everyday layout and a testing layout | Switch between them without starting over |
Most teachers settle on one everyday layout and change it a few times a year. The descriptions below will help you pick it.
1. Rows
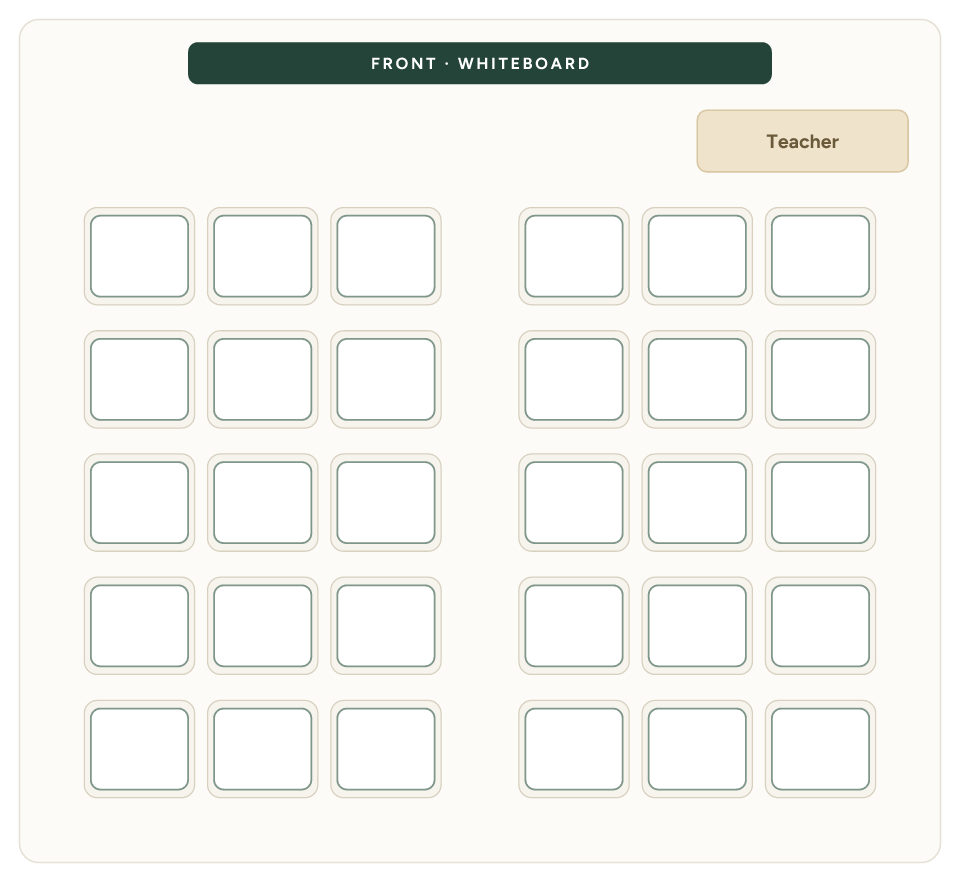
Best for: direct instruction, note-taking, new classes · Watch out for: limited peer interaction · Template: 30 seats (Letter PDF, A4 PDF)
Rows are the traditional classroom layout for a reason: every student faces the board, you can see every face from the front, and it fits the most desks into a rectangular room. That makes rows a strong choice for the first weeks of school, when you're still learning names and setting routines.
The trade-off is interaction. Students mostly see the backs of heads, and anything beyond turning to a neighbor takes effort. Students in the back rows also tend to drift.
Make it work
- Leave a center aisle so you can reach every student without squeezing past chairs.
- Put students who need to see the board in the first two rows, and keep them there with a front-row rule.
- Pair rows side by side for quick turn-and-talk moments without changing the layout.
Prefer to plan on paper? Download the printable rows seating chart template.
2. Pairs
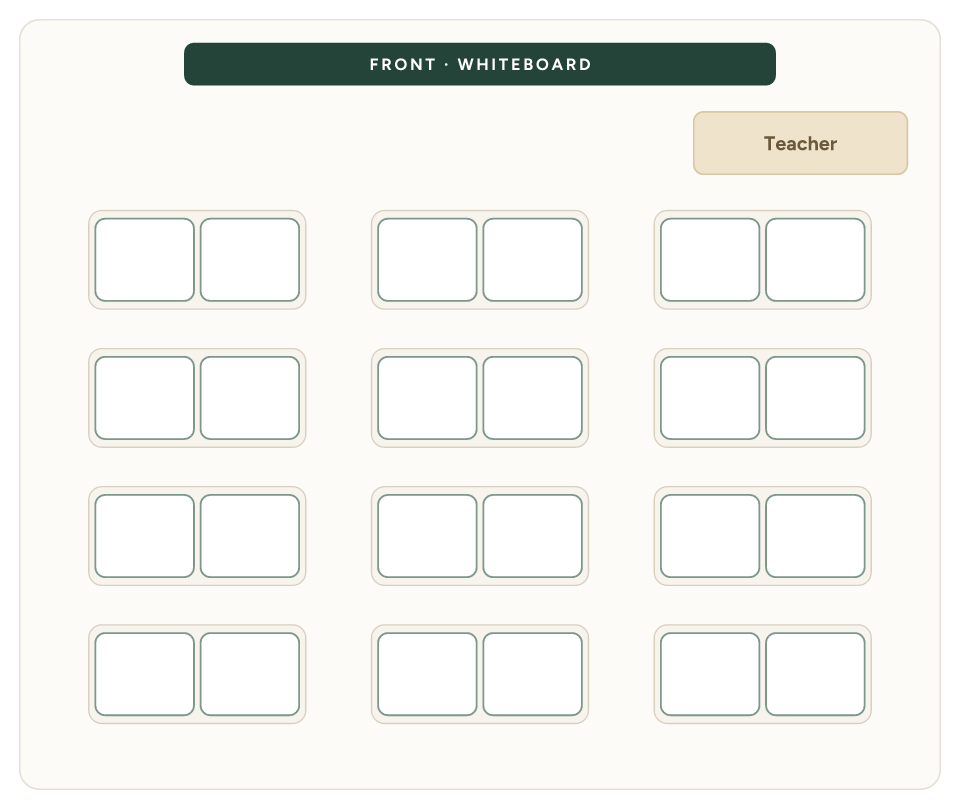
Best for: think-pair-share, partner reading, peer checking · Watch out for: one off-task pair can pull a row with it · Template: 24 seats (Letter PDF, A4 PDF)
Pairs keep the focus on the board while giving every student a built-in partner. It's one of the most flexible everyday layouts: you can teach from the front, then switch to partner work without moving furniture.
Because every student spends the whole period next to the same person, the partner matters more than in any other layout. That's where seating rules earn their keep.
Make it work
- Use keep-apart rules for the pairs you already know won't work.
- Use keep-together for partners who help each other, such as a student who translates for a classmate.
- Reshuffle partners every few weeks so students learn to work with more of the class.
3. Pods of 4
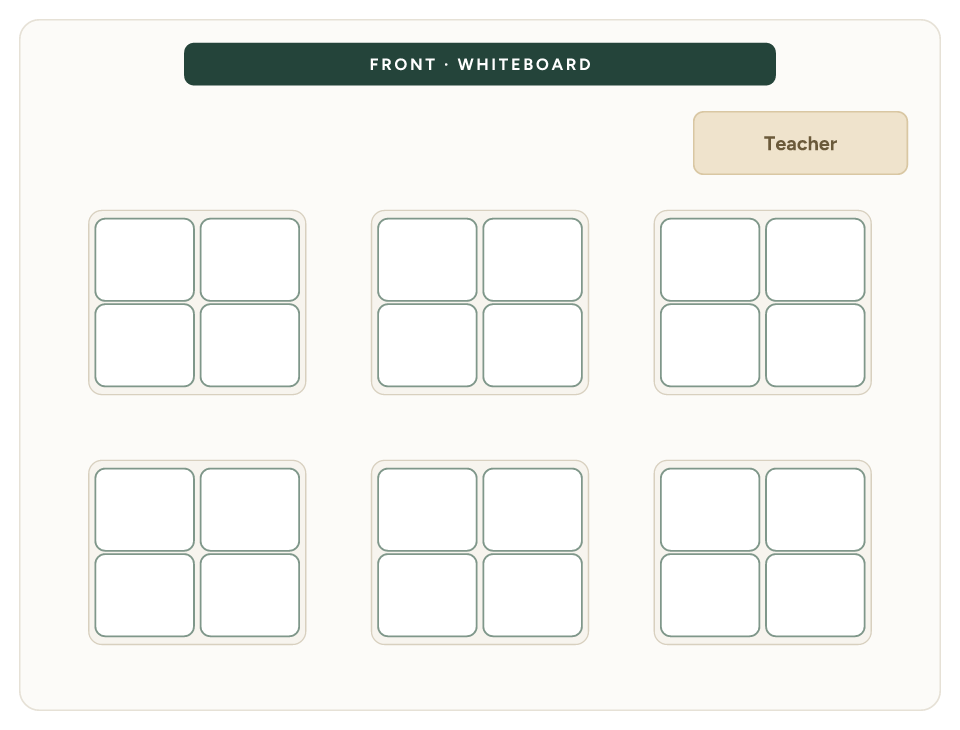
Best for: group projects, stations, collaborative problem-solving · Watch out for: some students face away from the board · Template: 24 seats (Letter PDF, A4 PDF)
Pods of four push desks together into small tables. Groups of four are easy to manage: big enough for real discussion, small enough that no one can hide. Pods also save floor space, because desks share edges and you need fewer aisles.
The catch is direction. In every pod, at least two students sit sideways or with their backs to the board, so pods work best when most of the lesson happens inside the group, not at the front.
Make it work
- Angle pods slightly toward the board, or have students turn their chairs during instruction.
- Give each seat in a pod a role, such as reader, recorder, materials, or timekeeper.
- Use keep-apart rules so the students who distract each other land in different pods.
4. Clusters of 6
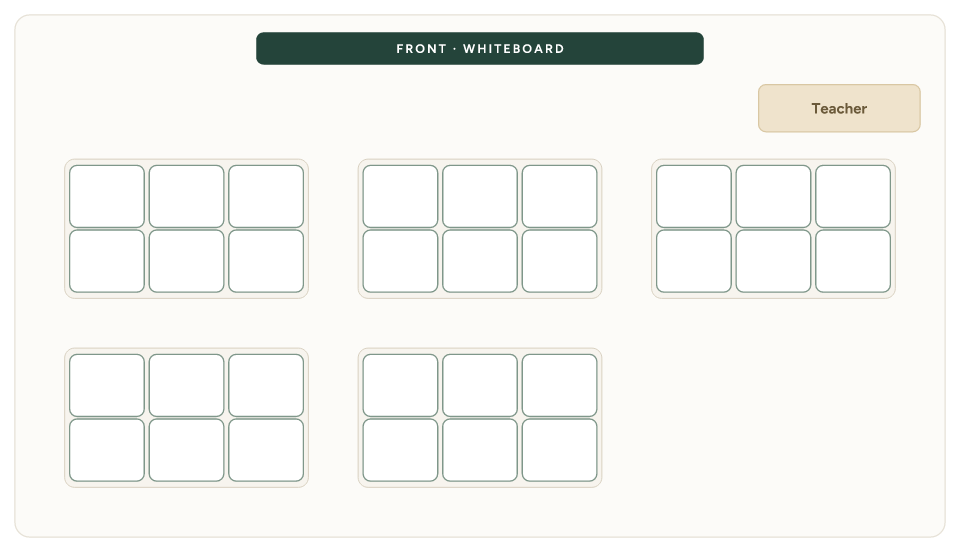
Best for: project teams, table-based classrooms, elementary grades · Watch out for: noise, and quieter students fading into the group · Template: 30 seats (Letter PDF, A4 PDF)
Clusters of six are common in rooms with tables instead of desks, and in elementary classrooms where students sit at the same table most of the day. Six students share supplies easily and make a natural team for longer projects.
Larger groups are harder to keep balanced. In a group of six, two or three students often do most of the talking.
Make it work
- Split each cluster into two groups of three for focused tasks, then bring the six back together to share.
- Spread strong readers, English learners, and students who need support across clusters instead of grouping them together.
- Name each table so directions like "Table 3, line up" are quick.
5. Horseshoe (U-shape)
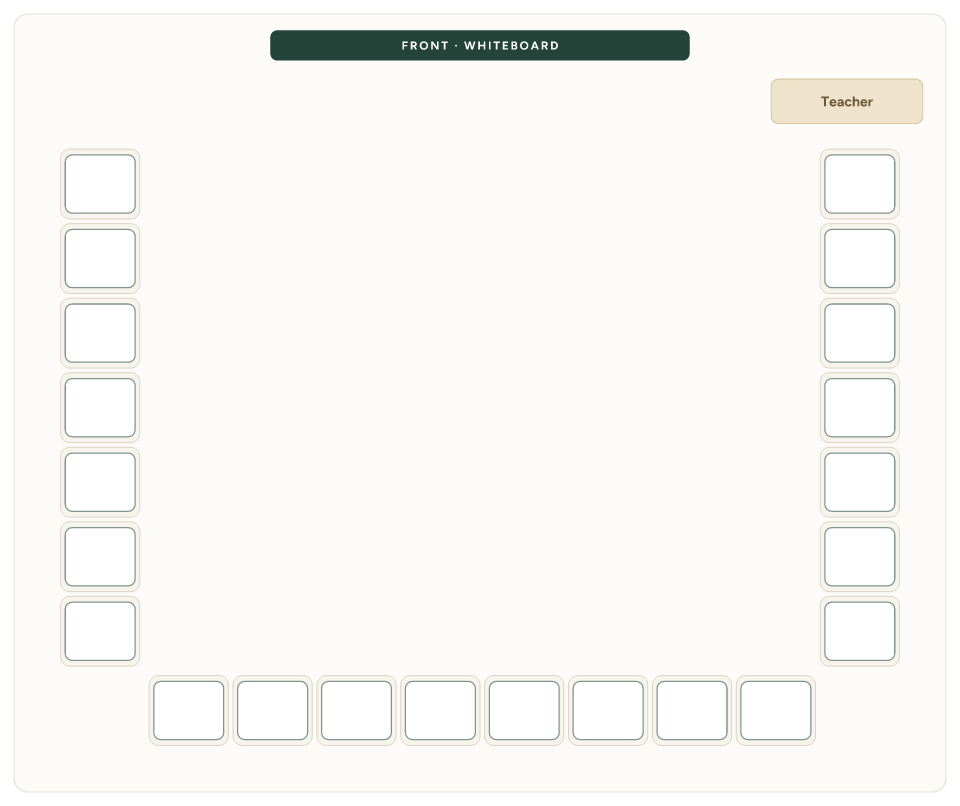
Best for: discussions, Socratic seminars, read-alouds · Watch out for: fits fewer desks than rows in the same room · Template: 22 seats (Letter PDF, A4 PDF)
A horseshoe arranges desks in a U facing the board. Every student can see the board and most of their classmates, and you can walk into the middle of the U to reach anyone. It's one of the best layouts for whole-class discussion.
It's also one of the hungriest for space. Because the middle of the room stays open, a horseshoe holds fewer desks than rows in the same footprint.
Make it work
- Before you move furniture, try the layout with your class size to see whether it fits your room.
- Seat students who need extra support near the open end of the U, closest to where you teach.
- If your class is too big for one U, try the double horseshoe below.
6. Double horseshoe
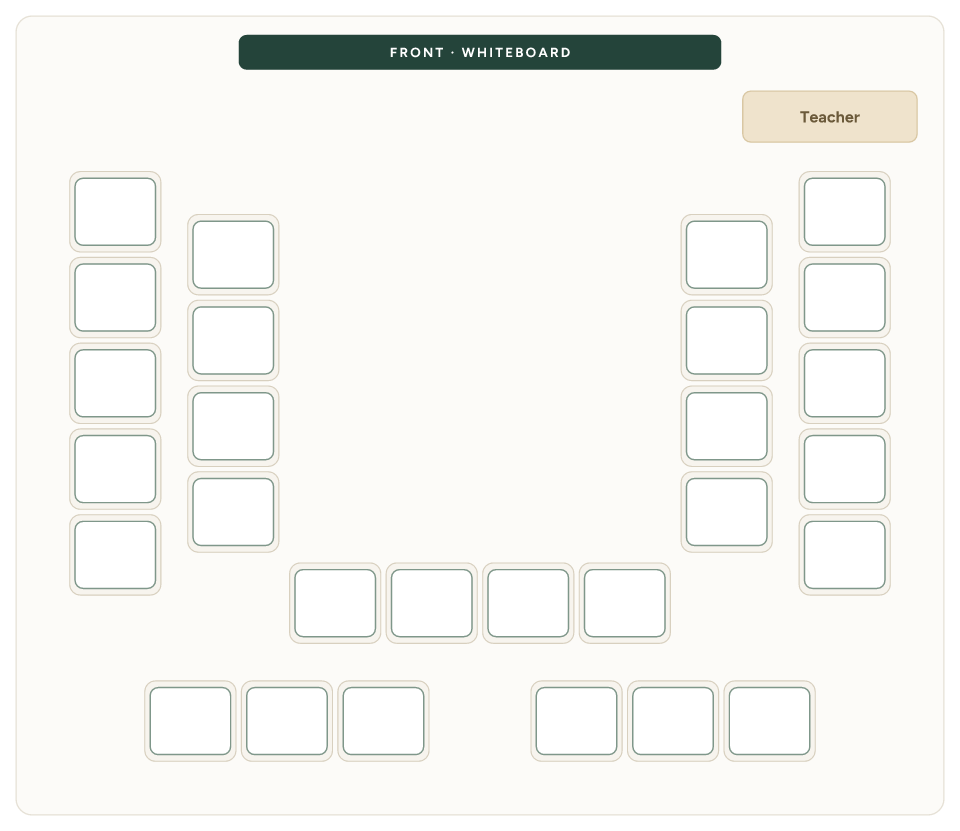
Best for: discussion with larger classes · Watch out for: the outer row can feel like the back row · Template: 28 seats (Letter PDF, A4 PDF)
A double horseshoe places a smaller U inside a larger one. You keep most of the benefits of a horseshoe, with students facing each other and an open center, while fitting more desks into the room.
The outer U needs a little care. Students there are further from the action, and the inner row can block their view.
Make it work
- Offset the outer desks so each one looks between two inner desks.
- Rotate students between the inner and outer U when you reshuffle.
- Put students who need the board, or who drift, in the inner U.
7. Chevron (stadium seating)
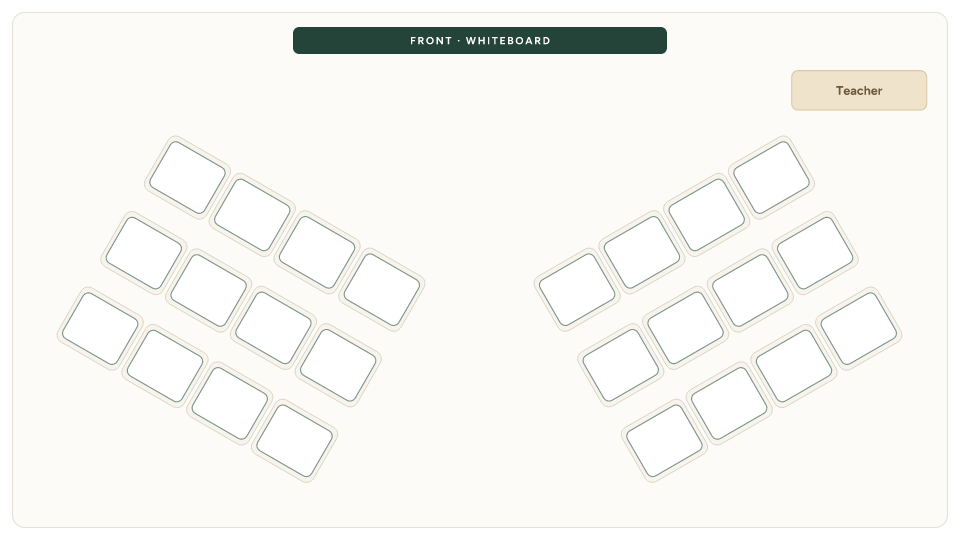
Best for: instruction with frequent turn-and-talk · Watch out for: needs a bit more width than straight rows · Template: 24 seats (Letter PDF, A4 PDF)
Chevron seating angles the desks on each side toward the center of the room, so the rows form a shallow V that opens toward the board. Students still face forward, but they can also see more of their classmates, which makes quick discussion easier than in straight rows.
It's a good compromise for teachers who lecture often but want more interaction than rows allow.
Make it work
- Keep the angle gentle. About 30 degrees is enough to open up sightlines.
- Leave a center aisle so you can walk to the back of the V.
- Pair angled desks for turn-and-talk without moving anything.
8. Circle and fishbowl (inner–outer circle)
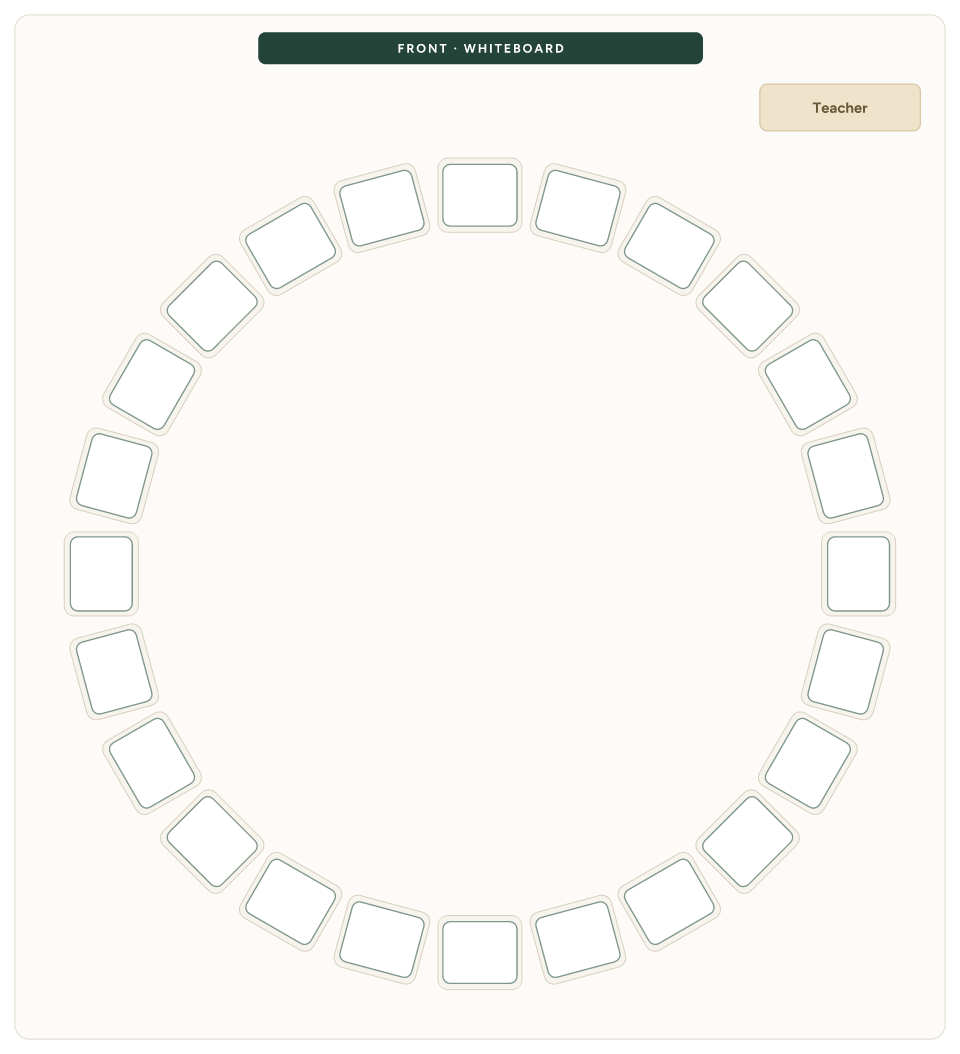
Best for: Socratic seminars, morning meetings, community circles · Watch out for: no one faces the board · Template: 24 seats (Letter PDF, A4 PDF)
In a circle, everyone sees everyone, and there's no front of the room. That makes it the strongest layout for discussion and community-building, and the weakest for anything written on the board.
A popular variation is the fishbowl: a small inner circle discusses while the outer circle listens and takes notes, then the groups swap. Fishbowl discussions work well for Socratic seminars and debates, because every student gets a turn to speak and a turn to listen closely.
Make it work
- Use a circle for specific lessons and switch back to your everyday chart afterward.
- For a fishbowl, keep a separate chart for the inner group so swapping takes one click.
- Give students a clear way to signal that they want to speak, since there's no front to direct attention.
9. Testing
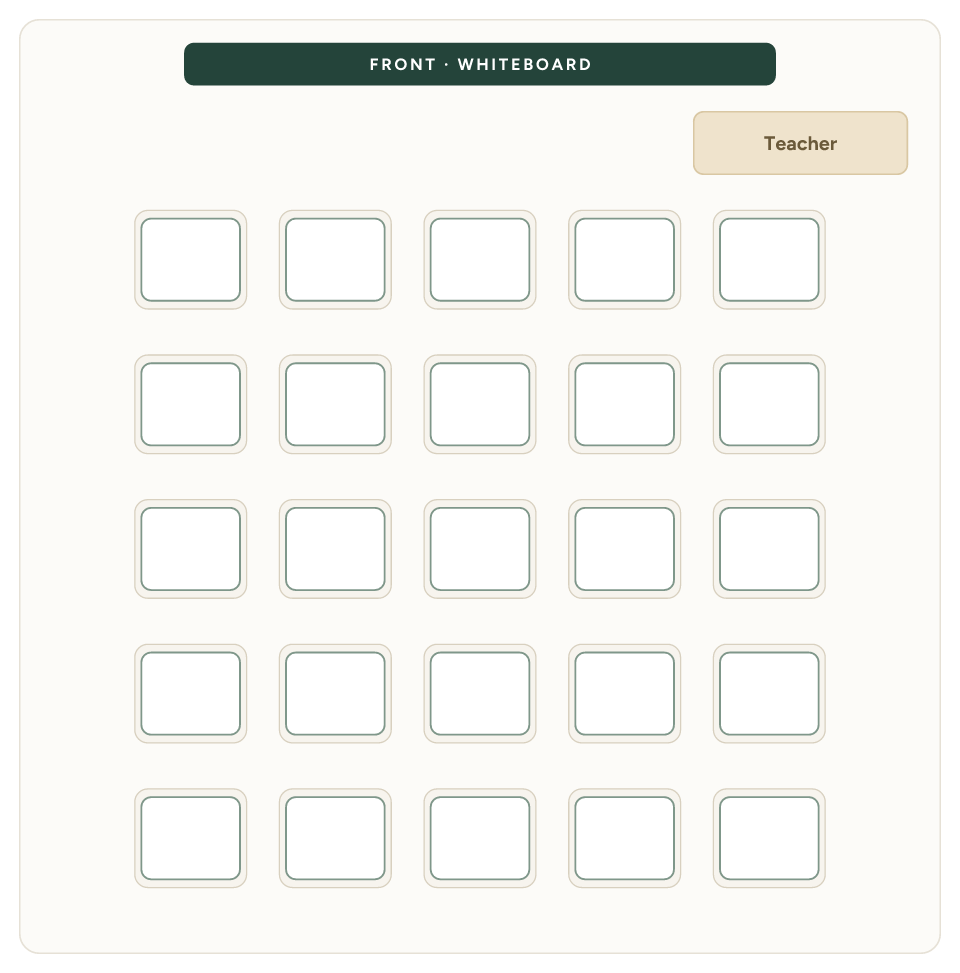
Best for: exams, quizzes, independent work · Watch out for: takes the most floor space · Template: 25 seats (Letter PDF, A4 PDF)
A testing layout spaces single desks in rows with as much distance between them as the room allows. Everyone faces the same direction, and no one can easily see a neighbor's paper.
Most teachers don't use it every day. They keep a testing layout as a second chart for the same class and switch to it on test days.
Make it work
- Shuffle students for tests instead of keeping everyday seats, so neighbors don't know each other's habits.
- Keep the keep-apart rules you use all year. They matter even more on test day.
- Print a teacher's-view copy for proctoring, with the front of the room at the bottom of the page.
Need a blank copy for test day? Grab the printable testing seating chart.
10. Lab benches
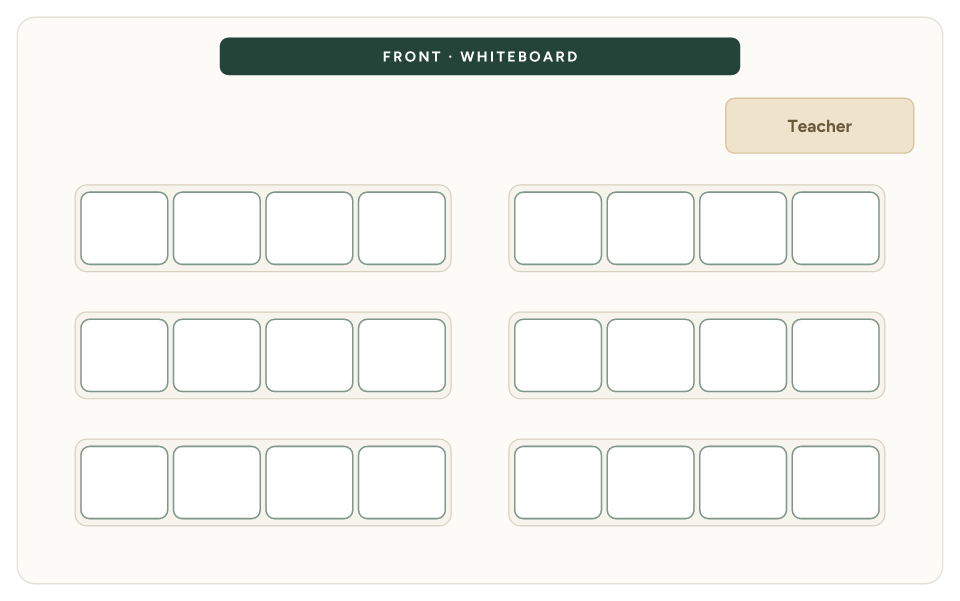
Best for: science labs, makerspaces, computer rooms · Watch out for: bench partners matter more than usual · Template: 24 seats (Letter PDF, A4 PDF)
In a lab, the furniture is usually fixed, so the seating chart is about who sits at which bench, not how desks are arranged. Benches of two to four students share equipment for the whole period, which makes bench partners central to both learning and safety.
Make it work
- Set keep-apart rules before the first lab, not after the first incident.
- Keep aisles to exits, sinks, and safety equipment clear in your plan.
- Mark the benches nearest the demonstration table as front row for students who need a closer view.
Flexible seating and classroom zones
Flexible seating means students don't spend the whole day in one assigned desk. Instead, the room is divided into zones, each set up for a different kind of work, and students move between them. A flexible seating classroom still needs a plan. It just plans spaces as well as seats.
Common zones in a flexible seating classroom:
- A whole-class area in rows, pairs, or a horseshoe, facing the board, for instruction and anything students need to copy down.
- A small-group table, often a kidney table or a pod of four at the side of the room, where you work with five or six students while the rest of the class works independently.
- A collaboration zone with tables arranged in clusters for projects and stations.
- A quiet or reading corner with a rug and soft seating for independent reading, read-alouds, and morning meetings.
- A standing or focus spot for students who work better on their feet or away from the group.
Classroom table arrangements for zones. If your room has tables instead of desks, the same ideas apply: push tables together into clusters for the collaboration zone, line one or two against a wall as a quiet row facing away from the group, and keep one table near your desk for small-group instruction. Leave clear walkways between zones so students can move without crossing through a group at work.
Why every student still needs a home base. Flexible seating works best when each student also has an assigned seat for the start of class, attendance, transitions, tests, and fire drills. Without one, the first five minutes of every period turn into negotiation, and a substitute has no way to match names to faces. Assign the home base with a seating chart, then let students move during work time.
Common mistakes to avoid:
- Adding zones faster than routines. Introduce one zone at a time and teach how to use it.
- Letting the same students claim the best spots every day. Rotate access, or assign zones by group.
- Forgetting sightlines. From your usual teaching spot, you should be able to see every zone.
You can sketch zones in ClassRows before you move anything: add a rug for the reading corner, drag tables into clusters, and print the plan along with your home-base seating chart.
How to test a layout before you move a single desk
Moving 30 desks to find out a layout doesn't fit is a lost afternoon. Try it on screen first:
- Open a layout in the classroom seating chart maker. Every layout on this page has an "Open in the editor" button.
- Paste your class list. ClassRows adjusts the number of seats to fit your class.
- Drag desks, doors, and the teacher desk to match your real room, and rotate desks for angled layouts like chevron.
- Add your keep-apart and front-row rules, then shuffle.
- Print the chart, or a blank version to sketch on.
Prefer paper? Every layout here is also available as a free printable classroom seating chart template.
Changing your classroom layout during the year
Your layout doesn't have to last all year. Common times to change it:
- After the first few weeks, once you've learned names and know how the class works together.
- At the start of a unit that calls for a different kind of work, such as a project unit in pods or a discussion unit in a horseshoe.
- When behavior slips, a new layout resets habits faster than a new set of reminders.
- Before testing season, set up your testing chart early so test day is one click.
Changing the layout and changing who sits where are different decisions. For seat changes within the same layout, see how often to reshuffle in our random seating chart generator guide. And for group work that doesn't need a full seating change, a random group generator can split the class in seconds while keeping the right students apart.